01 09 10

Subtitle

A personal look at the trails and triumphs of creating. Creating a business, creating a Sacred Self Care practice and creating your authentic self.
Showing posts with label making of. Show all posts

Monday, August 24, 2015

How I Got Started: Allergies

Today we start a new series. This one is all about what led me to starting Scarlet Moon Creations. It will be 4 parts so look out for the other posts in the upcoming weeks. Today we'll talk about my allergies.

Image By Evan-Amos via Wikipedia Facial Tissue
 I am a walking allergic reaction waiting to happen, or at least I feel that way. I grew up always having allergies to what seems like everything. Luckily, I've only found one thing to be deadly and its been easily avoidable since that very close call. However, if you watch allergy medication commercials they'll have you thinking that people only get allergies during certain seasons or that you can only have one category of allergies. For me that has never been the case. I have indoor allergies, outdoor allergies, allergies during pollen season, allergies during weed season, even allergies during the summer and winter. I have a couple of food allergies and I'm allergic to dogs, cats, dust, mold, some insects, many cleaning supplies, and synthetic fragrances which are in our soaps, shampoos, lotions, deodorants and cosmetics. Add to that my nose is very sensitive so things like cigarette smoke and too much perfume in an enclosed space set me off as well. Even just walking past Sephora is overwhelming.

The outcomes of all this is usually sneezing, running eyes and nose but can lead to a sore throat, headache, dizziness and the absolute worst is a sinus infection which has flue-like symptoms. I get allergies 10 times more often than I've ever gotten a cold. The trade off for these mostly mild, yet annoying (and often gross), symptoms is I hardly ever get really sick. I think I get the flu once every couple of years or so and that's about it.

Which is good, but try heading to a job interview sniffling and dripping all over the place because you stood upwind from someone too liberal with their cologne on the way there? Or failing a finals test because everyone wanted the windows open to let in some "fresh air"? Or having people wonder why you have a bag full of restaurant napkins and tissues because YOU NEVER KNOW? Or being unable to breathe because you tried that glass of wine? Or taking a shower to clean up and coming out covered in hives (sneezing in the shower is not fun by the way)? Or almost dying because your event host forgot to tell you that "oops, we put walnuts in the brownies"? Or questions people's food before you eat it because you don't want to die? Or how about not remember a good time with family and friends because you were too busy blowing your brains out? Yeah, its not fun. 

A couple of years ago I had an opportunity to learn about herbs and oils (I'll go into more details about that in another post). I had up until this point just tried my best to avoid the things I could and just carried allergy medication and a ton of tissues for those I couldn't (hard to avoid the air outside when you still need to breathe). But after this one class on herbalism I talked to a few people and started doing some research on certain herbs online and that led me to finding out about all natural movement online and the fact that I can make a lot of the stuff I use at home with natural products myself. 

The internet is a rabbit hole but in this instance it was very beneficial. I had up to this point never gone to a spa for fear of having a reaction that would embarrass me and them. I had only bought one set of skin care products for my face which I only used twice, shame on me since I broke out both times using it. But now I could try making a "fancy" bath soak or a moisturizing body scrub using decadent scents that might not annoy me. I did tons of research down in that rabbit hole. I bought a few basic ingredients that I could use for other things as well if they didn't get along with my skin or nose. 

Image By NIAID via Flickr
Essential oils turned out to be a godsend. I love scent and this is something that my allergies have taken from me up until this point. But now I can use them to clean and/or scent a room as well as care for my skin and even help relieve my allergic reactions. I cannot tell you how many times I have run home to sniff some tea tree oil since I discovered its existence.

And herbs, spices, roots and resins; these items that come from trees and other plants, I have in my kitchen as well as my work room. They add great color, scent and flavor to my meals as well as my homemade bath and body products. They help heal as well as reduce inflammation. A good chamomile compress relaxes my sinus headaches while other herbs reduce the look of the dark circles I get from rubbing my eyes. What I also love is that the scents never get overwhelming like a lot of chemical fragrances. No headaches or dizziness. 

How could I not share this with others? I couldn't, so I didn't. Read more about this in next weeks post; How I Got Started: Gifts.

Wednesday, August 20, 2014

My Post-Bound Book Making Process

I said I would do this in my last post. So here it is with pictures. This set of pictures is when I made a personalized Book of Shadows or journal.


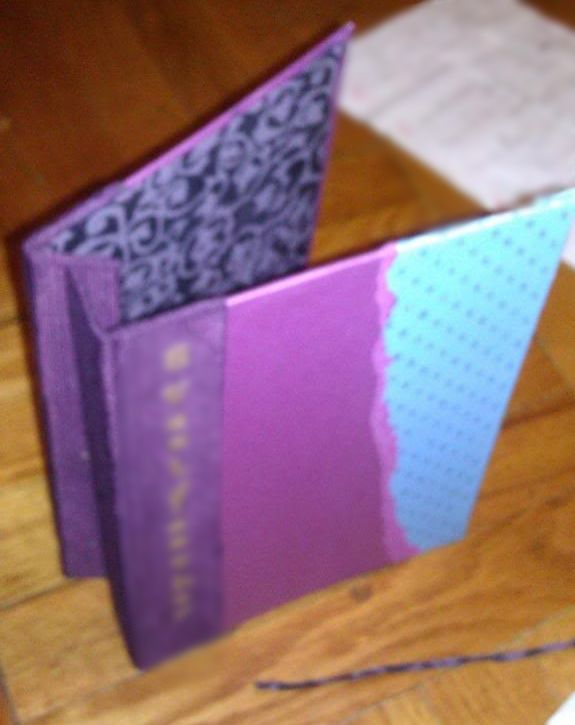
Before we begin, here is the finished product. I also want you all to know that this is only the 2nd book I ever made. The first one I made for myself and its much bigger but I did not take any pictures at the time. This book I decided to make since the first one came out decent enough and I wanted to make a gift for a friend. I had lots of supplies left over and I had been collecting specialty book papers for the net bookmaking occasion.

When I took these pictures it was mostly for me to be able to look back on what I've done. So they are far from perfect; I used my the camera on my cell phone and this was back before megapixels was a big deal and my flash wasn't so great (believe it or not the overhead lights were on throughout this picture taking process). I chose to use this book and these pictures to showcase my process as more of a walk down memory lane rather than a sleek, fashionable post trying to get you to buy something (that'll come later ;) ).

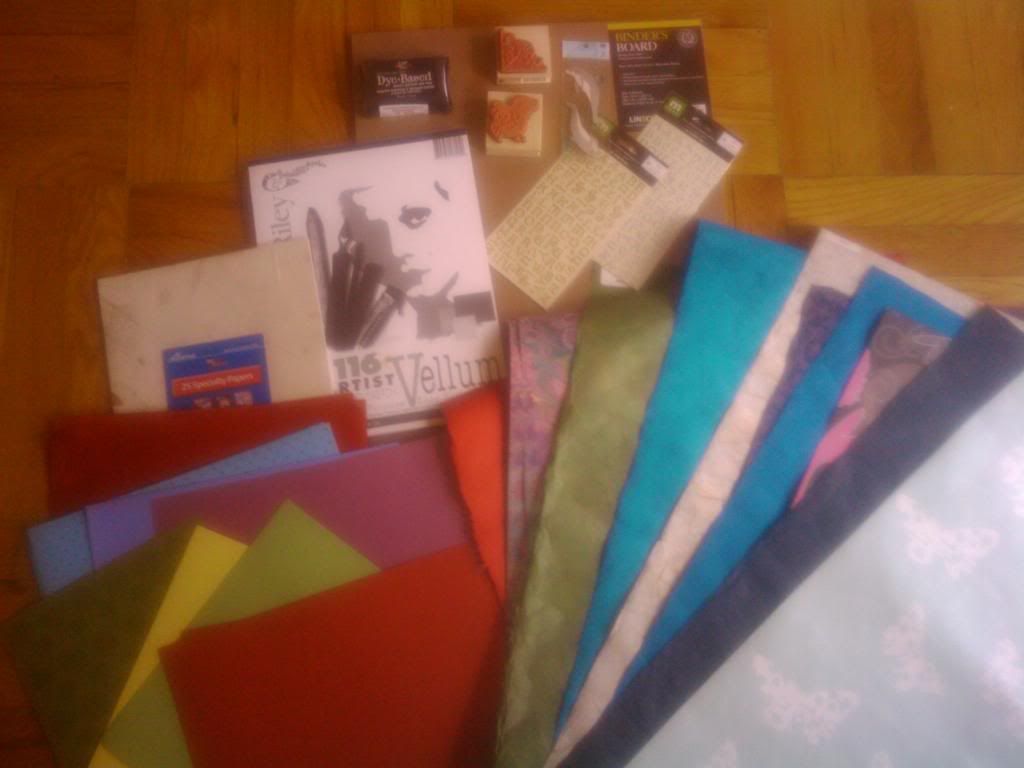
First, I must start off with supplies which in this case, consists of book board, vellum paper, stamps, stick-on letters, book cloth and end papers. Other supplies not shown include, hole punch, screw punch, rulers, crafters glue, a cutting mat, x-acto knives, paintbrushes, and scissors. All used in the average bookmaking process.

Now, the first step is to cut down the book board to the cover size you want. I made this book roughly 6"x9" and the book board I had gotten was 12"x12". Book board, just so you know, is hard, pressed cardboard-like material. Just think of any hardcover book or textbook cover. Its comes in multiple thicknesses but it hard to damage and protects the precious pages within its borders. Again, at the time all I had to properly cut the book board were my x-acto knives. It was slow going. but it got there.

From there you want to do some more cutting, this time of various papers. It helps to have a plan in mind for what you want to book cover to look like. I did not really at this time. I knew the colors I wanted to use and the papers but how was I going to make it all work I did not know. So I cut down the interior paper to size, then I contemplated the cover papers I wanted to use. I had three; this lovely sky blue with polka dots, a glossy lilac and this dark purple Japanese book cloth and I decided to layer them across the cover.


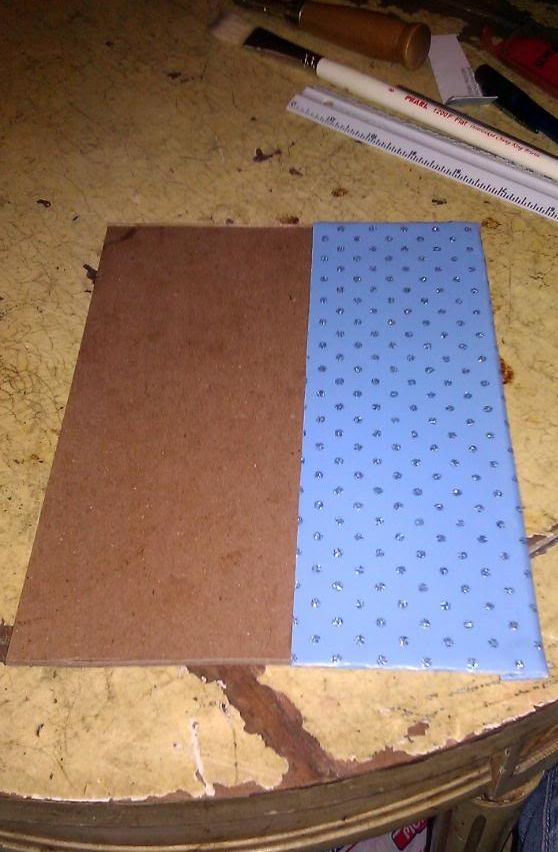
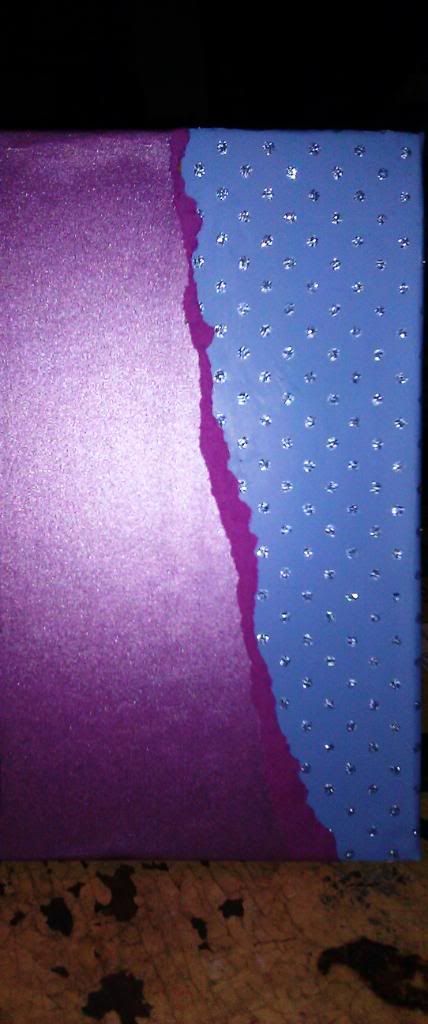
First, I cut down and glued on the baby blue paper as shown above. Since I was going to layer the other parts over it there was no need to use paper enough to cover the entire front cover. Now here comes the interesting part. I planned a completely boring, in my opinion now, straight, vertical layer of the of the glassy lilac paper over the blue and in an effort to keep as much glue off of the sections you will see I did not brush glue over the entire back of the lilac paper. When I went to glue down the rest of it, I accidentally ripped the paper. Thinking that I would have to start the whole thing oer from scratch, I just finished the rip and pull of the excess. That resulted in this.


The glossy lilac ripped to interestingly, I left it on. I loved the matte finish that showed at the edges of the tear and it seemed to me that it gave this feeling of revelation. Like, ooh look what's under here. Like I said, the ripped layer stayed. Next came the last layer, which I wanted just for that library book look; the darker toned spine. Now, one thing to remember is that the books I make are post bound. This one in particular has no spine. But in order for the book covers to be able to open properly, they have to cut out separately from the section of book board that the posts will screw into and then connected with book cloth, book paper, etc.

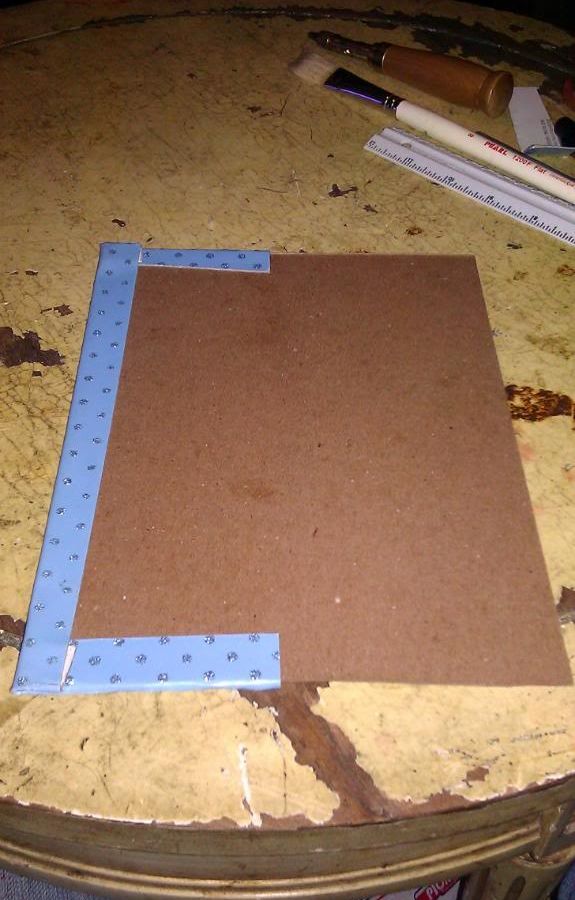
As I leave the partially complete cover to dry under the many, many books that I own (much cheaper than a press), I went back to the book board and cut out the ends for the covers. They will be the same length as the covers but only about 1" wide. Once I have those cut out I must now drill holes in them with my screw punch. I chose to use 3 holes on this particular book. Then I brought back the now dried cover with the two other layers already on it. I measure and cut out the amount of book cloth I will need and lay it face down to brush glue over the back. Leaving a centimeter or two of space between the front cover and its corresponding spine, I place them on the glue and fold the end of the cloth over to connect the two pieces; making sure to leave the space in between so the book cover can be opened.


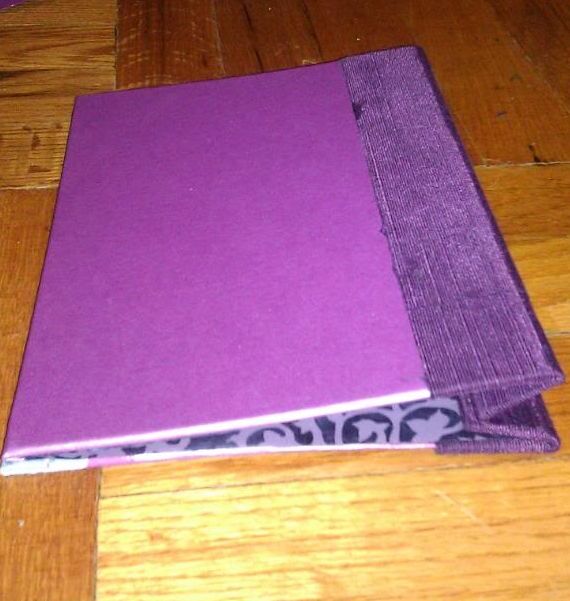
As you can see above there on the left hand side, there is a small indentation where there is nothing but book cloth. Here is where the book cover will bend when you open it. Now the back cover, I decided to keep simple by using just two layers; the glossy lilac and the purple book board to connect the back cover with its spine. You can see that below this time the crease is on the right-hand side.

You might think the covers are done but they are not. When was the last time you opened any book and saw the book board on the inside cover? I think its safe to say never for most of you. More often then not when it comes to hard cover books you'll see some type of fancy paper called end paper. End papers are usually a different type of paper than used anywhere else in the book and are folded in half with one end glued to the inside of the covers and the other end serves as the first page of the book. For the purposes of this book the end papers only line the inside of the covers. 


As you can see above, I used a very thin, almost tissue like paper with a subtle floral print in matching colors for the end papers. And just so you know, I have since learned that its more visually appealing to leave a bit of the cover papers showing around the edges of the end paper inside. I pasted these inside each cover with very little glue, careful to brush it on evenly since this paper was much more delicate than any of the others. Too much glue and it would bleed through the paper or worse rip it. 

After setting these aside once again between tons of books to dry flat, I got ready the hole puncher to punch through the book cloth and make the holes I screwed into the book board visible again. I also, took the vellum which I intended for use inside and punched holes in the same areas as those on the covers and I also creased the pages so that they would bend easily when turned. For these jobs I use a simple paper cutter with various settings. 

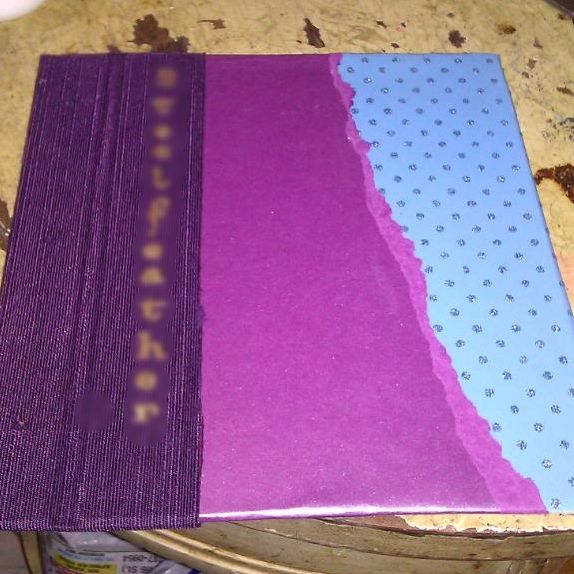
Once the covers are dry, I take them out and line them up for personalizing. There was only a bit more added to it including, on this particular book, adding the name to the front spine with simple stick on letters. They've been blurred out a bit in a previous picture above. Then I line up the pages and the covers by their holes and screw them all together with the screw posts. 


Et Voila!

Wednesday, February 13, 2013

New order means new pictures

Here are some pics of me making and putting together the Romantic Package for my very first buyer on Etsy.
These first five or so are the Bath of Rose bath salts.


Next are two shots of the Romantic Massage n' Bath Oil.


Then there are several of the making of the Orange n' Rose Body Scrub.
And the last shot is of all three items in the Romantic Package together.